
Creating your own soy wax candles can be a fun and rewarding experience. It may seem intimidating to some, but it is actually a very easy process once you get it down. Candles make great gifts and you could also turn it into a side business by selling them locally or on an e-commerce site like Etsy.

I have put together a step-by-step guide and a list of the items you will need to create your own soy wax candles.
Disclosure: this post contains affiliate links. If you decide to purchase any of these resources I earn a small commission at no additional cost to you.
Supplies
Soy Wax
I highly recommend using Soy wax because it burns much cleaner and slower than other waxes. Amazon has a great brand that is perfect for beginners. Depending on the size of your candles – you can make approximately 20 candles with this 10 pound bag.
You can also order 5, 25, and 45 pound bags of it. I would start out with the 10 pound bag shown below here. If you decide that you want to continue making or selling candles I would recommend buying the wax in bulk from a supplier like Candle Science to save on costs.

This kit below is another good option for beginners as it comes with 100 wicks and 2 wick centering devices. Click here to check it out.

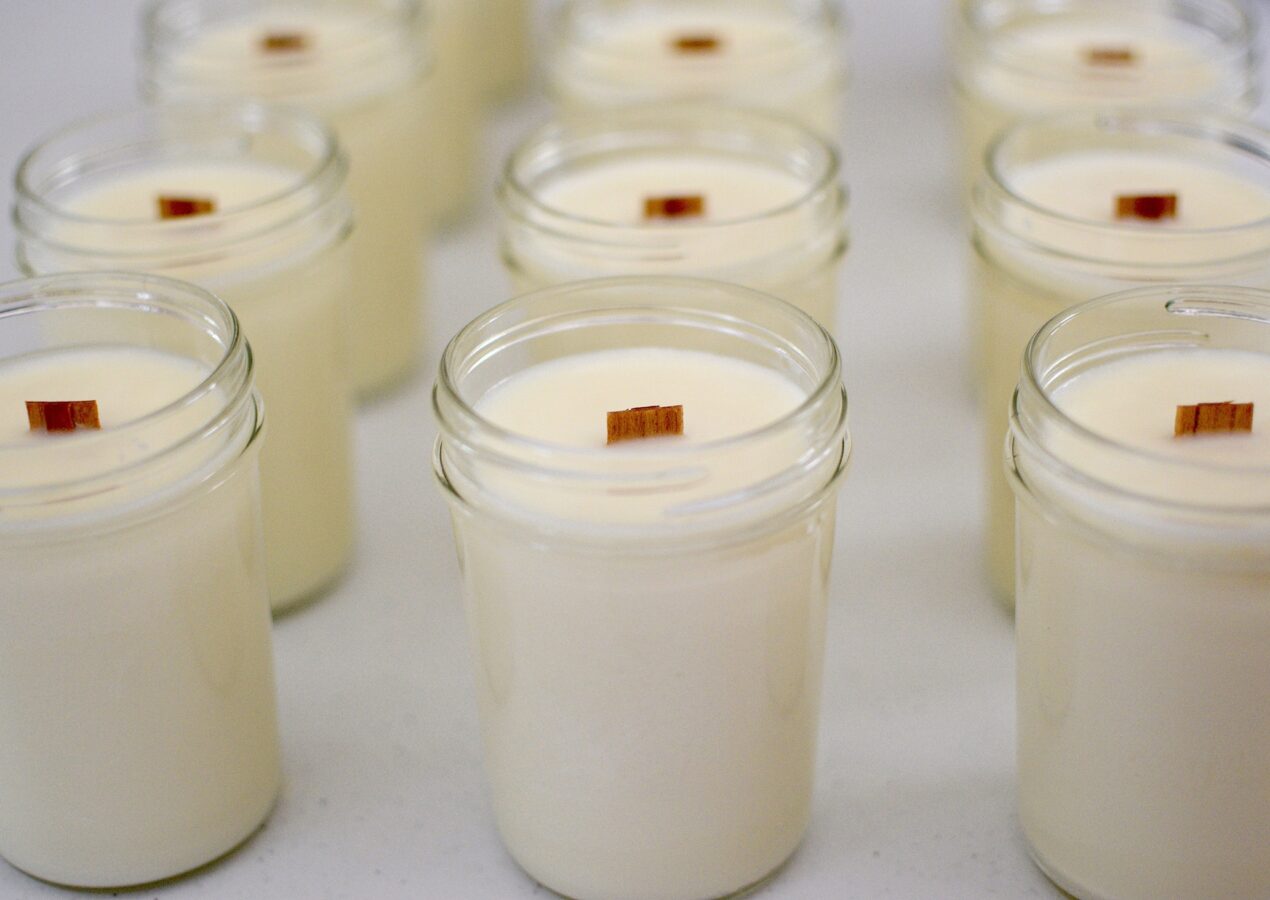
Jars
Next you will want to decide the type of jars you will use. Again, Amazon is a great starting point for supplies because of the free shipping on most items. Another fun idea is to visit a local thrift shop and use containers or even tea cups that you find. Here are a few of my favorite options:
Metallic Candle Tins

Regular Mouth Mason Jars

Round Glass Jars

Hexagon Glass Jars

Mason Jars

Melter
Once you have chosen your jars and your wax you will next a way to melt your wax. The cheapest option is to use a double boiler, where you can melt your wax over a boiling pot of water. The downside to this is that you will not be able to melt a lot of wax at a time.

The wax melter I use is pictured below. This one is a little more expensive, but holds up to 6 quarts of wax so you can make larger batches at a time. I would recommend investing in one of these if you decide to sell your candles. It also comes with a spout so that you can easily pour the wax into a jug. Check this one out here.

Wicks
You will now need to choose your wicks. I choose to use wooden wicks because they are different and I just love the crackling noise they give off. They do tend to be quite a bit more expensive than regular cotton wicks though. Here are a few options from Amazon:
Here is one option for wooden wicks from Amazon. This comes with 50 candle wicks, 50 metal bases, and 54 candle warning stickers. You will still need to buy the wick stickers in order to get the wicks to stick to the bottom of your jars.

This 60 piece set is a great option because it comes with the wick stickers and a centering device to make sure your wick is in the middle.

Here is another great option for cotton wicks. This 100 piece set do not come with wick stickers or a centering device so you will need to purchase those separately.

Make sure that if your wicks do not come with wick stickers that you also purchase those. Here is a set of 600 wick stickers from Amazon for a great price.
Fragrance Oils
The best part of candle making is picking out the fragrance oils that you will use! For beginners I would stick with 2 or 3 different oils to start out with. Amazon does have some options but I would highly recommend checking out Candle Science or Rustic Escentuals for better quality oils and a huge selection. Since you obviously will not be able to smell the oils before purchasing, I would recommend reading the reviews and descriptions for the oils.
If you do decide to purchase some fragrance oils from Amazon I suggest the Nature’s Oil brand. They have a large selection and their prices are great. Click here to see their full collection.

Other Supplies
Candle Making Pouring Pot
You will need a pouring pot to let your wax cool in and to add the fragrance to before pouring into your jars. I highly recommend this one from Amazon.

Thermometer
You will need a thermometer to measure the temperature of your wax before adding your fragrance oil. This is very important because if you add your fragrance oil when the wax is too hot, it will burn off the fragrance and your candle will not throw off any smell. I use an infrared thermometer because you do not have to insert it into the wax.

A cheaper option is to use this thermometer probe which is just inserted into the wax.
Heat Gun
You will use a heat gun to smooth over the tops of your candles. Sometimes they can turn out slightly bubbled or have imperfections and this will help to create a beautiful smooth surface.

Scale
You will also need a scale to measure the amount of wax and fragrance oil. I use this food scale from Amazon on the “Ounces” setting.

Metal Spoon
If you don’t already have one, you will want to make sure you have a metal spoon or stirrer used specifically to stir in the fragrance oil into the wax. Here are a set of 2 from Amazon.

Wick Trimmer
You will need a wick trimmer to trim down your wicks once you have made your candles and they have cooled. Here is a cheap option from Amazon.

The Process
Once you have purchased all of the necessary items to create your own soy wax candles you can get started. First and foremost you will want to figure out how many candles you will be making in your batch. I would recommend starting with just 1 or 2 so that you can get the process down.

- Measure out your wax – The amount of wax you will use will vary and you may have to experiment a little to get the measurements to be exact. When using 8 ounce jars I generally use approximately 6 ounces of wax per candle. You will want to weigh this out using your kitchen scale (like the one pictured above).
Make sure that you “Tare” your jug on the scale before adding the wax. This will minus out the weight of the jug and only measure the weight of the wax. - Prepare your jars – Make sure that your jars are on a level surface and are spaced several inches apart. Add your wicks using the wick stickers and center the wicks using wick centering devices.
To prevent your glass jars from having a “frosted” effect I would suggest heating up your jars before pouring in the wax. I usually use my heat gun to warm them up slightly. - Melt your wax – Once you have measured out your wax, add your wax to your melter. Once the wax has reached 200 degrees, remove it promptly and pour it into your metal jug.
- Measure/Add fragrance oil – I would suggest using 10% fragrance oil to get the most throw out of your candle. This will be 10% of your wax weight. So if you were to make two 8 ounce candles (12 ounces of wax) I would then add 1.2 ounces of fragrance oil. Again, measure this out using your food scale and be sure to “Tare” your measuring cup container first.
Every fragrance oil has a “Flash Point”, either listed on the bottle itself or it can usually be found in the description online. This is the temperature of your wax that you will want to add the oil. This is VERY important because if you add the fragrance oil to the wax when it is too hot it will burn off and your candle will have no smell.
Once your wax has reached the flash point temperature, add your measured out fragrance oil to the wax and stir lightly (not vigorously) for two minutes using a metal spoon. I usually stir in one direction for one minutes and then the other for the second minute. - Pour the wax – After you have added your fragrance oil and stirred the wax for 2 minutes, you will then want to wait until your wax has reached between 135-145 degrees to pour into your jars. This will help to prevent rough tops on your candles and wet spots on your jars. You will also want to pour your wax in slowly. Adjust your wick so that it is in the center of the candle.
- Finish up – let your candle cool overnight at room temperature. Once it has cooled, trim your wick to 1/4″ before lighting. You can also use your heat gun to smooth over the tops if there are any imperfections or the tops look rough.

Once you have created your own soy wax candles you can put your finished touches on them by creating your own custom labels! The Avery Brand has tons of different label options that you can print on right at home. These brown kraft labels by them are my favorite, especially if you are looking to create a more rustic looking candle. They also have tons of other labels available here.
Leave a Reply